If you need additional info collected when certain items are entered/requested on the schedule (perhaps you'd like court case #'s entered on court overtimes?), then you can utilize our Custom Forms feature to dynamically display additional fields on requests and edit forms.
These forms are tied to the time type itself (e.g. if you have a "Court OT" overtime type, they will only appear when you have that "Court OT" selected/requested.
To begin, go here (Admin Tab -> Special Types & Designations -> Custom Forms)
To create a new Custom Form, click "+ Create Custom Form" in the top-left of the window.
First, you'll need to name your new form. Each form can be tied to multiple time types, so you don't need to be super-specific with your name. Let's name this one "Late Arrest Form".
Click Create, and you will be brought back to the page we started at (aka the Custom Form index). We've created the form itself, but now we need to specify data fields for it to collect.
To do this, click the "View/Edit" button next to the relevant form.
Now we can add as many or as few custom fields as we desire. Click "+ Add New Element" to create a new field.
There are 4 types of input field you can choose from...
You'll need to go to the profile of the time type you want to add the custom form to. This can be done for Time Offs, Overtimes, & Special Assignments. These are all located in the same section of the Admin Tab as Custom Forms ("Special Types & Designations").
For this example, let's tie this Custom Form to the "Late Dismissal" overtime type by clicking the "Edit" button next to it within the "Overtime Types" page.
These forms are tied to the time type itself (e.g. if you have a "Court OT" overtime type, they will only appear when you have that "Court OT" selected/requested.
To begin, go here (Admin Tab -> Special Types & Designations -> Custom Forms)
Create the Base Form
The page you arrive at (aka the Custom Form index) will be blank if you don't have any custom forms created yet, but once you do create them, they will all be listed here.
To create a new Custom Form, click "+ Create Custom Form" in the top-left of the window.

First, you'll need to name your new form. Each form can be tied to multiple time types, so you don't need to be super-specific with your name. Let's name this one "Late Arrest Form".
Click Create, and you will be brought back to the page we started at (aka the Custom Form index). We've created the form itself, but now we need to specify data fields for it to collect.
Add Fields to the Base Form
To do this, click the "View/Edit" button next to the relevant form.Now we can add as many or as few custom fields as we desire. Click "+ Add New Element" to create a new field.
There are 4 types of input field you can choose from...

- Short Input
This will add a small text field where people can type-in short answers.
- Long Input
This will add a larger, resizeable text field where people can type-in longer answers.
- Boolean (Yes/No)
This will add a checkbox field, that can either be "checked", or "unchecked".
- Choices
This will allow you to specify choices of your own creation that people will be able to select from. You can add as many choices as you desire, and order them to your satisfaction.
Tie Custom Forms to Time Types
You'll need to go to the profile of the time type you want to add the custom form to. This can be done for Time Offs, Overtimes, & Special Assignments. These are all located in the same section of the Admin Tab as Custom Forms ("Special Types & Designations").
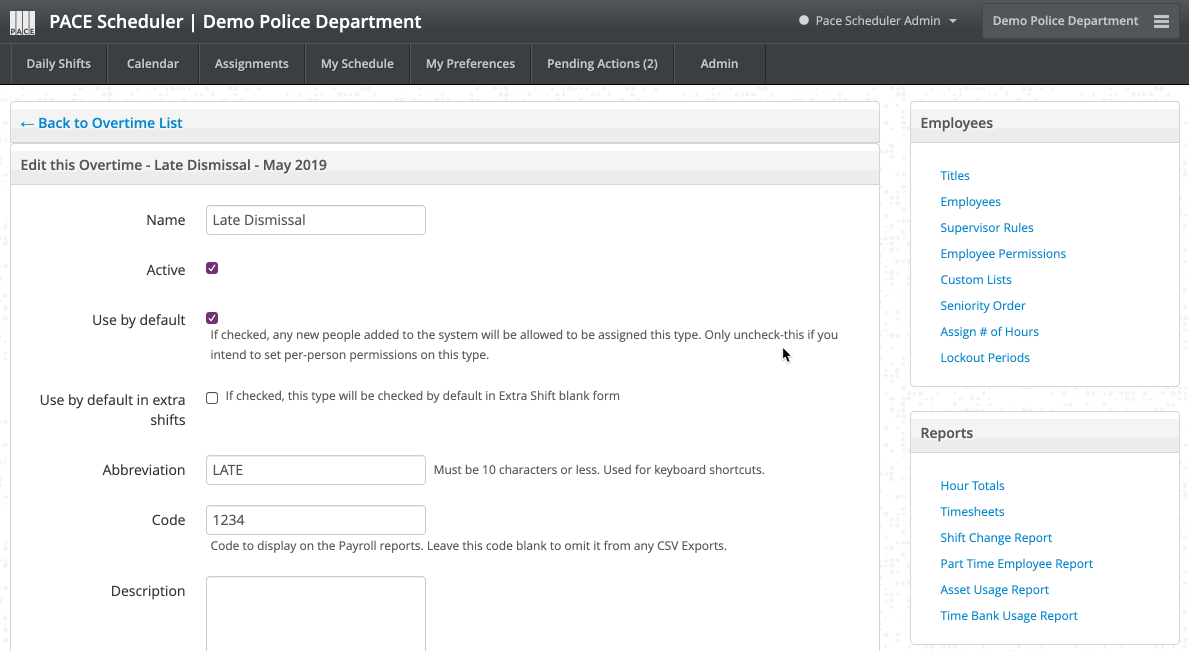
For this example, let's tie this Custom Form to the "Late Dismissal" overtime type by clicking the "Edit" button next to it within the "Overtime Types" page.

Each item's profile has a field labeled "Custom Form", where you can select from your available Custom Forms. Here, I've selected the "Late Arrest Form" we just made, then clicked "Save".
Presto! We're Done!
That's it! Now anytime the "Late Dismissal" time type gets selected (via request or manually added by a supervisor/admin), this for and its associated fields will appear in the window, allowing the user to fill those in with the relevant information.
You can view custom form responses by seeking out the request/edit it was a part of, which is easily done via the Shift Change Report in the reports section of the Admin Tab.
NOTE
While Custom Form entries are tracked in our system, primarily via the "Shift Change Report", they are not searchable, filterable, or otherwise able to be queried.
You can view these submitted forms and their answers, but you can't, for example, sum a custom field that has numbers in it.
You can export the Shift Change Report to Excel and apply filters and such there, but our software itself does not have this ability.